Sunday, November 30, 2014

Training - Long Guns - Part 3 - Consistency - The Barrel


I started this group of posts on shooting a long gun accurately with a definition of exactly what I mean when I use the word “accurate”. Next, I began with one of the fundamental components that play into an “accurate” shot – the cartridge. In this post, I want to address a second element that affects an “accurate” shot – the barrel.

The two primary purposes of a long gun’s barrel are to contain the explosion from firing a cartridge and to project the majority of the energy that the explosion generates down the barrel towards the muzzle. And, to then grab the bullet, spin it and send it towards the intended target with as high a degree of accuracy as it can.

Again, just as a quick reminder, “accuracy” is a subjective term tailored to the task at hand. A sniper’s definition when making a cold bore shot at 500 yards is something entirely different than an armed citizen engaging a threat in their home at 45 feet. Accordingly, barrels can vary widely between tasks. For matters of this discussion, it is a broad based topic and not meant to completely cover the fine details of producing a barrel that can consistently shoot a sub 1-MOA out to 500 yards and beyond. It is simply my intent to provide enough information to see how much time, effort and money it can take to build an “accurate” rifle barrel.

Raw Material

Let’s begin with the raw material. First what it must do. It must contain chamber pressures approaching 50,000 and handle bullet velocities in excess of 3,000 fps. And, do so again and again and again . . . while maintaining its individual form factors insuring that the 10th shot or 100th or 300th is within the design specifications of the barrel.

In today’s world there are two primary types of steel that are used for this task. The first is Chrome Molybdenum used for such items as drive shafts, connector rods or axels for heavy machinery. In the US, these are typically designated 4140, 4150 and 4340. These particular types of steel are typically cheaper than other alternatives and can be readily coated for the familiar “blue” or “black rifle” color we are all familiar with.

The alternative material is typically stainless steel. Designated as 416 stainless it has the ability to be hardened by heat treating. It has a high chrome content, typically around 10% and has sulfur added to enhance it machining ability. In this configuration it is described as “free machining” and is “rust resistant”. It is widely held that stainless barrels have a longer life and are more accurate. Again, keep in mind is context driven.

Since a barrel needs to contain an explosion that can approach 50,000 psi, its “tensile strength” becomes another important characteristic you must pay attention to. Tensile strength is measured in PSI and it that force required to break a 1” rod by pulling on both ends until the rod separates. For the types of steel we are talking about, their tensile strength typically exceeds 100,000 PSI, twice the expected pressure expected to be contained by the chamber.

To adjust a barrel’s tensile strength it can be “hardened” – typically through heating. The balance that needs to be struck here is between tensile strength and how “brittle” the barrel becomes. Very brittle barrels that are struck on everything from rock to trees may well fracture making for a very bad day the next time a round is fired. In general, measured on the Rockwell C scale of hardness, barrels comes in at between 25 to 32.

Finally, while being heat treated to adjust the tensile strength and hardness of a barrel, stress can be introduced into the steel. As the barrel is run through the milling process and steel is removed these stresses may well bend the metal. To circumvent that, the raw rod is typically heated to a temperature around 600*C and then allowed to cool slowly over the better part of a day. This process may be repeated more than once to make sure the metal going to milling is as stress free as it can be made.

Most barrel “stock” is 1.25 inches in diameter and between 12 and 20 feet long. It is from this stock that a raw barrel is cut and prepared for milling.

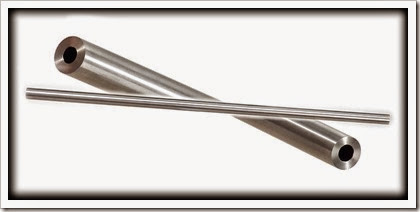
Barrel 1

Drilling the Hole

There are specially built drills – Gun Drills – that are used to drill a very precise hole in the center of the stock barrel. Modern metals have made this process a bit easier as have modern lubricants. Depending on the machine either the drill is pressed through the barrel or the stock barrel is pressed onto the drill. The final result is a hole, precisely down the middle of the barrel that is typically 5 thousandths smaller than the desired bore diameter.

Reaming the Hole

Once the preliminary hole is drilled, a ream is used to mill the hole to the proper bore size as well as putting a high quality finish on the bore as well. Again the range of material used to make the ream varies providing tools that can ream a bore at speeds that vary from 1 inch per minute to as quickly as 10 inches per minute.

Rifling the Barrel

Rifling is the creation of “lands” – which are the diameter of the bore and “groves” which is where material is carved out typically to a depth that is a few thousandths. There are three primary methods of rifling a barrel – Cutting, Button Rifling and Hammer Forging.

Cutting

The oldest method invented in Nuremburg in the very late 1400s. Each of the grooves is removed, one grove at a time. Each cut, 1/10,000 of an inch is made. Once the first pass in made, the process is repeated until the desired depth is achieved. The typical time to do a barrel using this method is one hour.

As is the case many times, war accelerates technology. During WWII larger machines with advanced cutting heads replaced the “single point” machines that greatly accelerated the rifling process.

Button Rifling

The Button method radically accelerated the rifling process. A tungsten carbide “button” is formed with the rifling pattern created in “relief” – i.e. the grooves are raised to remove material and the lands are indented to leave material behind in the barrel.

The button is then attached to a “rifling head” that sits atop a steel rod that is then hydraulically pushed – or pulled - through the bore. The rifling head is rotated in such a way to provide the correct “twist rate” for the finished barrel. The metal for the grooves is removed, the metal for the lands is left behind.

Using the button method a barrel can have its rifling added in approximately a minute.

Hammer Forging

War again entered the picture with the German’s development of hammer forging. A tungsten carbide mandrel with the rifling in relief – as with Button Rifling – is inserted into a bore. A series of opposing hammers then use a rotary process to sequentially hammer the barrel down on to, and into the shape of the tungsten carbide mandrel. As this process continues the barrel physically lengthens growing as much as 1/3 in length.

Today’s hammer forges can turn out a finished barrel in about three minutes. While having the advantage of a highly polished interior there is significant stress introduced into the barrel during the hammer forging process. As such, true target shooters shun this type of barrel. That said, many manufacturers have begun to adopt hammer forging for many of their firearms for uses from hunting to military.

Adding the Profile

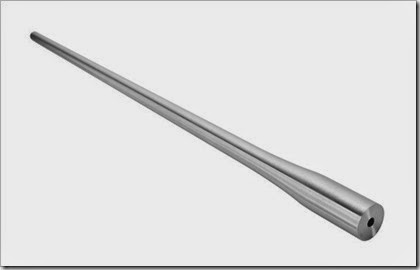
The final profile of the barrel is added nest – from “pencil” barrels to fluted barrels, care must be taken during the profiling process to assure that there is no changes in the centerline of the finished barrel. The material that is removed it typically done by a simple lathe.

Barrel 2

Lapping

Lapping is a finishing process to polish the bore, remove any machining marks and tight spots. While embraced by some, others simply consider this part of a breaking in process and rather than lapping, prefer to “shoot it out”.

Final Accuracy of the barrel

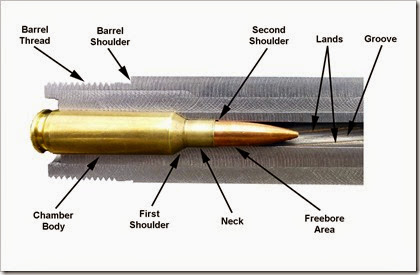
There are two elements to this. First, that the bore is perfectly centered on the chamber milled into the rear of the barrel. The bore needs to be perfectly concentric for its entire length. The rifling must be consistent from the front of the Free Bore area to the end of the barrel.

The second element is the chamber that is milled into the rear of the barrel and centered on the bore. It is there that the worlds of a consistent cartridge, a finely machined barrel and chamber meet. One must fit the other perfectly with the bullet perfectly centered in the bore and its Bearing Surface resting in the Free Bore area. A perfect cartridge, containing a perfect bullet shot down the bore of a perfectly milled barrel will deliver as accurate a shot as the firearm is capable of delivering.

Barrel Chamber - 2

It is at this point again where we once again meet up with the word “accuracy”. The more accurate each and every shot must be, the more the machining of the barrel and the manufacture of the cartridge matters. For defensive purposes, at ranges out to 300 yards – you have much more flexibility than you do for precision shooting out to 500 yards and beyond.

Know why you are purchasing that particular long gun – then pay for the accuracy you need for the purpose of the gun.
Friday, November 28, 2014

Training – Why did you shoot?


As I write this, it’s very late November 2014. We are in the immediate aftermath of the Grand Jury Verdict in the shooting of Michael Brown by Officer Darren Wilson. I suspect even years in the future you’ll be able to easily Google information about the shooting. The purpose if this post is not to rehash the past 3+ months of news stories about the incident, but rather to use it as a catalyst for a discussion with you. Why did you shoot?
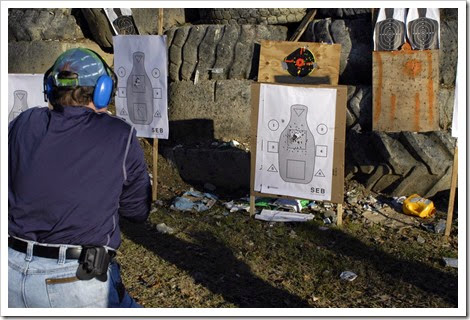
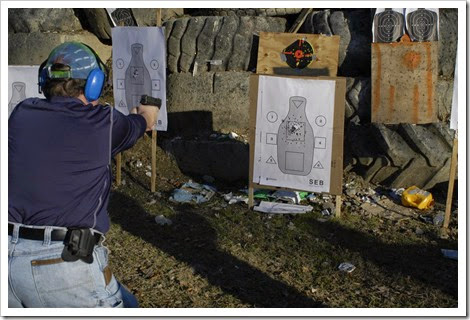
I’m taking you to a – hopefully – fictitious future where you have used your defensive weapon to defend yourself against what you perceived as a deadly threat. Your use of force as resulted in the death of the attacker . . . and you have been asked to explain yourself.

First a few disclaimers. I am NOT an attorney, nor do I play one on TV. Nor am I a law enforcement officer either. Yet I have spent hundreds of hours on different parts of this specific topic. It is a topic you need to put on your “urgent to-do” list. The information I am about to present is but the tip of the iceberg of the things you will be expected to know. So why bother? Because everyone needs to start somewhere. Everyone needs to understand that simply saying the words “I was in fear for my life” get you bupkis! I want you to begin to really think how you would articulate (remember that word) your specific actions – beginning with why you carry a gun . . . all the way to why you pressed the trigger. While watching the allegations being made against Officer Wilson, the outright perjury that was offered to the grand jury and the 24/7 media hype – it should be apparent to all reading this that should you ever take a life in defense of yourself, your family or someone in your charge . . . you better be able to explain why. So, as you read through this article . . . picture yourself in one of the TV cop interrogation rooms – with your attorney – answering the many aspects of the question . . . Why did you shoot?

Why do you own or carry a gun?

Let’s start there. On the day you took a life you had a gun . . . why? Now, today, would be a good time to starting thinking of the answer to that. Perhaps you have been physically threatened by someone and you feel the need for protection. Perhaps your home has been broken into in the past, or you’ve already been physically attacked. Perhaps you were assaulted or raped in the past. Maybe crime is on the rise in your part of town. Something has moved you to purchase a defensive weapon. You need to be honest with yourself and clarify your answer so that should the need arise, you can clearly articulate why.

For me personally, I’ve chatted about this in many articles in the past. Even here in central Iowa, things have become frayed around the edges. Once quiet larger towns that now see weekly shootings, an increase in drug traffic, use of farm chemicals in the manufacture of Meth, folks stretched thin . . . thin enough for them to take shortcuts. The carrying of a defensive weapon doesn’t feel “out of line” but rather it just makes common sense.

Why did you choose that gun and ammunition?

Another questions that the gunny side of the house loves to talk on, and on, and on, and on about. But . . . really . . . should you be forced to defend yourself with the handgun on your side . . . why did you choose that gun? And, past that . . . can you shoot it? Can you show your training history – both course work presented by training professionals and your personal training that you do when you go to the range? How many hours did you spend on the range this year? What did you work on? How many rounds did that work require?

How about your defensive ammunition? What defensive round do you carry in your gun? Why? Do you have a round in the chamber? Why? Why not?

Let’s move forward to the “event”. You chose to use deadly force . . . why? Let’s talk a bit about definitions, your ability to articulate your choices and a few very specific things you need to keep in mind when thinking about your ability to defend your actions.

Use of Force

Most states allow an individual to use force to defend their own life, the lives of family members or individuals in their charge. However, there are limits. The amount of force used should meet the “Reasonable Man” test. Would a reasonable man, examining all the information pertaining to your specific use of force, determine that the amount of force was justified? Remember, you must only use the amount of force reasonable to protect yourself, your home, your property or to stop a crime.

There is a phrase that is used to describe this particular part of the examination of the “facts” . . . you may have only a handful of seconds or less to choose to use force . . . the jury has as much time as it wants to decide if you made the right choice.

Use of Deadly Force

The use of Deadly Force is limited to those instances where an individual is in imminent threat of the loss of their life or grave bodily harm and there is no other reasonable option available - either to escape or to use some other alternative other than the use of Deadly Force.

Remember, you must not be the person who had initiated the attack and there must be no other options available other than the use of Deadly Force. You must have a “Reasonable Belief” that your death was imminent or grave bodily harm would occur.

Many folks seem to see the words “deadly force” and automatically think of some type of firearm. In reality, there are a host of weapons from knives to ball bats that can easily fit the bill. For example, while handguns take a significant number of lives each year, hands, fists and feet claim over twice as many lives as do rifles.

Ability, Opportunity, Jeopardy and Preclusion

There are generally four specific aspects of a “threat” that are considered when you begin to look at defending your actions. These would be Ability, Opportunity, Jeopardy and Preclusion.

The use of lethal force that can end in homicide is justified in the situation of immediate, otherwise unavoidable danger of death or grave bodily harm to the innocent. — Massad Ayoob

“I had to shoot!!!” you say in court. The words “had too” are justified by your attacker having the Ability to attack you, the Opportunity to attack you, you – as a “reasonable person” had to believe you were in imminent danger of grave bodily harm or death – imminent Jeopardy and that the use of deadly force was your only available safe response – to the Preclusion of all other options available.

Ability, Opportunity, Jeopardy, Preclusion are the foundation of your justification for the use of deadly force.

Ability

The person attacking you has both the physical and practical ABILITY to inflict “immediate, otherwise unavoidable danger of death or grave bodily harm”. Remember, what a “reasonable man” would conclude, as well as context – comes into play. It is beyond what you think . . . can you convince a “reasonable man” that your attacker had the ability to kill you or do grave bodily harm.

A person with a gun has the Ability to inflict grave bodily harm or kill you throughout a broad range of distances. A person with a knife, a ball bat, a hatchet, a hammer, a screw driver when used as a weapon against you has the Ability to inflict grave bodily harm or kill you.

A very large man that is physically strong and determined has the Ability to beat you to death given the right circumstances.

You MUST be able to clearly articulate why you believed your attacker had the Ability to inflict “immediate, otherwise unavoidable danger of death or grave bodily harm”.

Opportunity

An attacker may well have the Ability to inflict “death or grave bodily harm”, but they must also have the Opportunity to do so – right now. They must present an “immediate, otherwise unavoidable danger of death or grave bodily harm”.

For example, while a person with a knife – a football field away has the Ability to inflict grave bodily harm or kill you – he does not have the immediate Opportunity – because he is 100 yards away.

A person with a knife – at a close distance – DOES have the Ability to inflict grave bodily harm or kill you and also has the immediate Opportunity as well because of the short amount of time it takes to cover the distance between you and them.

An armed intruder separated from you by a safe-room’s door has the Ability to inflict grave bodily harm or kill you, but lack the immediate Opportunity because of the door. A “reasonable man” may not believe you had the right to shoot them through the door. However, should the armed intruder break through the door and into the safe room – they now have the immediate Opportunity to inflict grave bodily harm or kill you.

Again - you MUST be able to clearly articulate why you believed your attacker had the Opportunity to inflict “immediate, otherwise unavoidable danger of death or grave bodily harm”.

Jeopardy

Jeopardy is a very subjective component of the need to use deadly force. Would a “reasonable man”, in your exact situation, come to the same conclusion you did – that you were in immediate Jeopardy ofotherwise unavoidable danger of death or grave bodily harm”. Your situation is NOT Potentially dangerous . . . it has Actually Become dangerous. We are surrounded daily by people who could potentially harm us. Some carry knives, some carry guns, some drive cars – but without an action meant to do you harm – they remain a Potential threat

The person who draws a gun and shoots at us, pulls a knife and attacks us, raises a bat to strike us, they have become an Actual threat and have put us in immediate Jeopardy

And keep in mind, should your attacker break off the attack and leave – you are NO LONGER in immediate Jeopardy – and would no longer be justified in the use of deadly force against them as they leave.

Again - you MUST be able to clearly articulate why you believed you were in immediate Jeopardy of “immediate, otherwise unavoidable danger of death or grave bodily harm”.

Preclusion

Preclusion looks at the attack on you and your response through a “wide-angle lens”. We are expected to use only the amount of force necessary that a “reasonable man” would determine was necessary to stop the attack, protect our family or to protect our property. This “wide-angle” lens of the “reasonable man” would Preclude all other options – and determine that our only possible response to defend our self was our “tool of last resort” – the use of deadly force.

The word implies that there were no other safe options – you could not run away, you could not use a non-lethal weapon without placing yourself in “immediate, otherwise unavoidable danger of death or grave bodily harm “.

You MUST be able to clearly articulate why you believed you had no other choice but to use deadly force to protect yourself from “immediate, otherwise unavoidable danger of death or grave bodily harm”.

Ability, Opportunity, Jeopardy, Preclusion . . . all individual elements in your personal defense once the shooting stops and your second fight for survival begins – in the court system. If you’ve never taken any time to think about how you would defend your actions, please let this article prompt you to get more education on this topic.

My first recommendation would be to take Massad Ayoob’s MAG20 course. It’s a great starting point. He also has a number of books in print that also addresses this exact topic. Bottom line, training in this topic is every bit as important as the training you do on the firing line. You ignore it at your own risk.

Disparity of Force

Let’s talk a bit about something called Disparity of Force. A few examples may help to better explain the meaning of the term

The attacker has a significant size advantage. A 230 pound male attacks a 120 pound female with intent to do her grave physical harm. This is a “Disparity of Force and plays into the decision to use Deadly Force. Would a “Reasonable Man” decide that the use of Deadly Force was justified by the woman to defend herself.

Or, home owner is confronted by multiple individuals entering their home – some are armed. Here too the Disparity of Force comes into play. Would a “Reasonable Man” decide that the homeowner was justified in using Deadly Force to defend against multiple intruders – some of which were armed?

Perhaps you are the victim of the “knockout game” and suddenly find yourself down on the sidewalk with a handful of attackers doing their best to knock you unconscious.

This “disparity” between your ability to defend yourself and the amount of force brought to bear against you by multiple attackers is one more element to consider in your personal defense in the court system.

Local, State and Federal Law

The laws regarding personal defense and the use of Deadly Force can vary widely from community to community, county to county and state to state not to mention at the federal level. It is your responsibility to know the law in your community and the laws of any other community or state you may travel to as well as all Federal laws regarding the use and transportation of firearms.

Remember that word “articulate”? That is what you MUST be able to do, across the board, from the type of defensive weapon your carry, to why you carry it, to the type of ammunition your carry in it, to responding to the task explaining that the circumstances of Ability, Opportunity, Jeopardy and Preclusion were such that you had no other choice but to use your defensive weapon to save your life, the life of a family member or the life of someone in your charge. You must be able to clearly explain your actions in such a way that a “reasonable man” would agree with you.

It might make sense to begin to think about some of the answers now . . .

Sunday, November 23, 2014

Review - NRA RSO Course AAR - 11-22-2014


The Range Safety Officer course is typically one of those “must have” courses that an instructor looks at, nods their head in agreement and then sign up for the next offering because it “just makes sense” to get your RSO certification. Fair enough, I agree . . . every instructor should become a RSO. Now, let’s look a bit deeper.

The responsibility of an RSO is essentially three fold . . . to insure that the range is safe and the range and any events they’re called upon to staff are run in a safe manner. To know, understand and run the range in accordance with the Standard Operating Procedures for that range. And finally, to use their head and be the go to guy/gal for everything from a malfunctioning firearm to someone misbehaving on the range to being expected to handle a catastrophic health emergency.

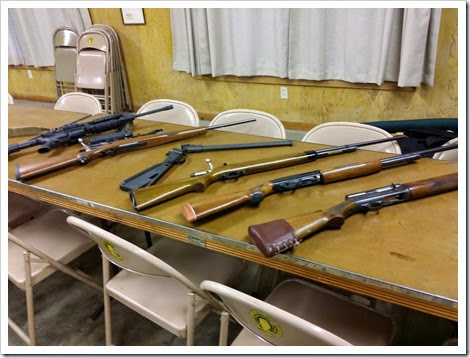
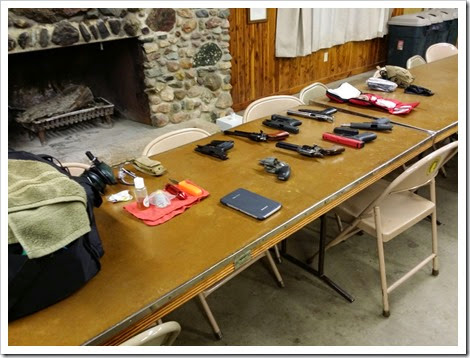
I got to the chapter house a bit early to fire up the heat and to lay out the classroom. For an RSO course I typically bring a broad range of handguns, shotguns and rifles. They provide some hands on experience for students who may have a somewhat limited exposure to some types of firearms. They’re also used for loading/unloading and clearing evaluations. While I fully realize that some of these folks have not touched some types of the firearms I bring . . . the fundamental process for loading/unloading is similar across broad types of firearms as well as clearing the most common types of malfunctions. Being able to watch them hands-on, to offer suggestions and field questions is invaluable to me as well as the student.

20141122_073413 (Medium)

20141122_073427 (Medium)

Chapter house warmed a bit, the students arrived, introductions were done and we rolled through the course. For many, this is the first time they’ve actually thought about a range from the POV that they would be responsible for its safety and its safe use. Early on we talked about the SOP for a range, its contents, why certain things were included, examples of range specific items and how this document and approach helps insure the range is safe and can be run safely.

Once they had the concepts of a safe range and running a range safely, small groups developed and gave their one range safety briefing. One was for a general pistol target match, one for a day of zeroing in rifles and finally a trap shooting event.

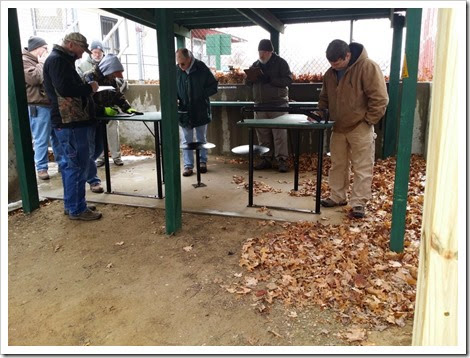
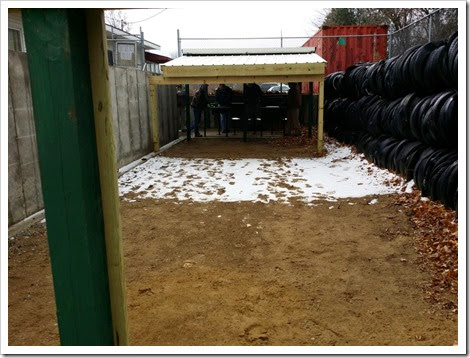
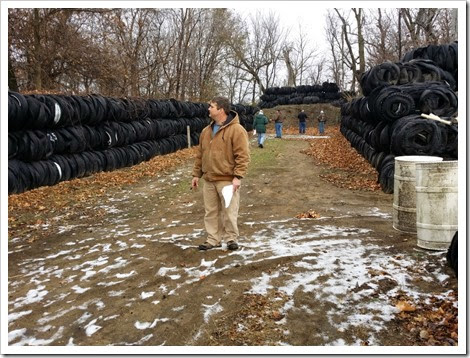
I also include an hour or so inspecting four different out door ranges – a pistol, rifle, trap and archery range. We talk about everything – from the general condition and cleanliness of the facility from the time they enter the driveway to the condition of each range. The care taken to keep a range up says a lot about the general safety one can expect to find on the range. A range filled with trash would imply general rules of courtesy are lacking . . . and so to general levels of safety. A tidy range facility generally implies that care is spread throughout the range . . . including insuring the safety of the shooters.

20141122_115045 (Medium)

20141122_115106 (Medium)

20141122_115528 (Medium)

We split the group into 3 teams that then evaluated each range with a debrief following the end of each range inspection. Everything from the benches and firing lines to the condition of the berms was looked at. This, again, can be quite an eye-opener, realizing that if they are the RSO for the day . . . they are responsible for insuring all of these areas are safe.

We started with the pistol range, moved to the rifle range, then archery and finally trap. There are things in common between each range – backstops, fields of fire, range condition and cleanliness . . . and some quite different like the raised platform for archery and the shooting positions on the trap range.

Other side discussions also took place, particularly in the area of responding to emergencies. Here too, this is a discussion that may well be missing from some coursework – many times because the magnitude of the discussion can be just too off putting. Yet, as instructors and RSOs, it is always within the realm of possibilities that things go sideways in a truly big way and you have an injured student on your hands.

I really push first aide training at some level. I’m personally fond of the Red Cross basic first aid course and their CPR and AED course as starting points. Their Wilderness Survival First Aide course is an excellent in-depth course as well. Bottom line, as an instructor and RSO . . . get some training!

After lunch we spent a fair amount of time discussing various types of malfunctions and then demonstrated clearing them with orange plastic ammunition and the firearms I brought into class. When you actually do some of this work hands on, it is easy to see how much of the process is very similar across platforms. That’s something much easier to show than to explain.

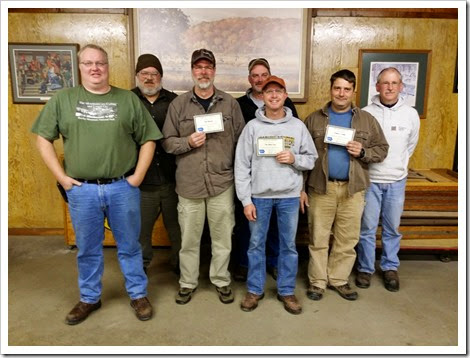
The exam and exit discussions followed . . . ending with the class photo and 7 brand new certified NRA RSOs. It was nice hosting you all, thanks for all your hard work!

20141122_163308 (Medium)

Congrats to Derek, Doug, Charles, Kevin, Todd, Tony and Don! Good Job!!


Tuesday, November 18, 2014

Commentary – Breaking Points . . .


Breaking Point  :  the point at which a person gives way under stress

                            :  the point at which a situation becomes critical

                            :  the point at which something loses force or validity

Much of the training in and around the defensive firearms community is looking for, pushing up to and then crossing a “breaking point”. It is at this point true learning occurs – the point at which what you are doing no longer works and you have to change/shift/modify what you are doing to move to the “next level”. Breaking points should be sought after, experienced, explored and – finally learned from.

Are you pushing your range work to the breaking point? (Please – safety first, OK) Can you “get the hit” and still pick up speed with your presentation? Can you quickly transition from a purely defensive method of targeting – say over the slide or “metal on meat” to a precision shot quickly and smoothly? Can you quickly and smoothly clear malfunctions, handle emergency reloads, see and move to cover? If you are not flirting with your individual breaking point . . . you are not growing as a defensive shooter.

How about you physically? Do parts of your range work wind you? Do you leave the range physically tired? How about your drills in the use of cover and concealment? Are you searching the limits of your physical breaking point as well? You can find a lot of information about yourself at that point. When you tell someone you intend to fight until you prevail . . . can you? If you never bump those limits, never push your physical boundaries . . . you’ll never find those things you need to strengthen and improve.

There are mechanical breaking points as well which will define whether the gun you carry is still fit to protect your life. Broken firing pins, strikers, ejectors, sights, triggers, safeties, barrels . . . all have some point where they will simply break. Searching for these flaws is part of your cleaning routine, but they are also just part of life. Guns are mechanical in nature . . . and they all reach a breaking point at one time or another . . . are you ready for that? Have you integrated a catastrophic failure in any of your training sessions? Have you even given it any thought? Murphy is a demanding instructor.

While reading this, have you noticed a general agreement . . . an acceptance that . . . “yep, I get it, things break . . . I need to keep an eye out for that!”  There is one other thing I would like everyone to keep an eye on . . . that can reach a “breaking point” . . . each other. Humans break . . . we all need to watch out for each other.

We see this in or vet community. Prior to “my day” things like shell shock was use to describe a vet so overwhelmed by his/her life events in combat that parts of their soul began to shutdown, withdraw. Vietnam brought the first diagnosis of PTSD – another description of a person simply overwhelmed by the enormity of their experience. For most there is an ongoing struggle of acceptance – war changes you – period. For others, over whelmed beyond their ability to cope – they simply “end” it . . . estimates as high as 22 per day . . . think about that.

As a nation 40,000 people end their lives every year. For those between the ages of 14 – 24 suicide is the second leading cause of death. The later fact is something our extended family learned this past week. The nephew of my son-in-law took his life. A young man I’d known for nearly 20 of his 23 three years. There were no real outward signs. He had plans, direction. Yet . . . he had a breaking point.

A friend and local editor penned an opinion piece that clearly states something he had obviously forgotten . . . the world is poorer without you.

My bottom line is this . . . everything has a breaking point . . . drills, our defensive firearms, our physical bodies . . . and our family and friends . . .

We need to make taking care of each other a priority . . . part of our purpose for living . . . so we can intervene, catch a friend or family member before they have passed their individual breaking point . . .

. . . because we all have’em . . .

Wednesday, November 12, 2014

Training - Long Guns - Part 2 - Consistency - The Cartridge


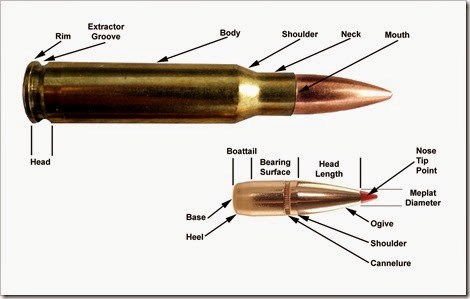
308 Cartridge with labels

Parts of a Bullet

Base – the bottom of the bullet is typically flat. However, there are some bullets that have a dish shaped base or a hollow base. These last two are typically used to insure the bullet achieves a solid seal as it travels down the barrel. The modern day rifle bullets are virtually all flat based.

Heel – the curved portion of the bullet aids in insertion into the casing, assists in even distribution of the gasses around the bullet

Boattail – A boattail on a bullet primarily lends to accuracy for distance shooting – say 300y or greater. A flat base has a tendency to be more accurate for short ranges. Overall, for a defensive shooter whose primary defensive range will typically be 25y to 50y, and the defensive accuracy of a fist sized group is the goal, the difference between a bullet having a boattail or not has virtually no effect.

That said, if your focus becomes precession shooting at distance, a boattail begins to a have a measurable effect on your bullet’s trajectory.

Bearing Surface – the Bearing Surface is that portion of the bullet that is the bullet’s full diameter. It is the part that actually contacts the lands and grooves of the rifling in the barrel. Its length is one of the factors that determine the pressure that is built up. Longer, there is more surface contact with the lands and grooves thus more friction and higher pressure. Large variances between Bearing Surfaces within the same bullet lot can mean differences in pressure between rounds fired causing the point of impact on the target to vary. Bearing Surface is one of the parameters of a bullet that a distance shooter attempting to create fully “identical” cartridges will measure and sort prior to cartridge assembly.

Bringing the Bearing Surface component back into the defensive shooter world, slight variations between bullets – when looking for a fist sized group at 300 yards – would be negligible.

http://www.6mmbr.com/medlerTUBBBSC.html

Head Length – The Head Length is simply the distance from the top of the Bearing Surface to the Meplat. For defensive shooting, the tolerance of this distance is of little consequence. However, for distance shooting the ratios between the Head Length, Neck – Shoulder junction and the outside case dimension become important in insuring the performance from one cartridge to another are as close to identical as possible.

http://www.6mmbr.com/jgcaseprep.html

Cannelure – the Cannelure can perform a number of functions. Perhaps the most common is simply a crimp mark so consistent bullet seating is made easier by placing the mouth of the casing on the Cannelure mark.

It is, at times, used to mark specific bullets – different mark sets can indicate a different weight or composition bullet.

Finally, it can act to help hold the bullet securely in place as a modern day rifle cycles – reducing any possible set back of the bullet into the casing during firing.

http://www.corbins.com/hct-1.htm

Shoulder – The shoulder is the point of transition from the Bearing Surface and the Ogive of the bullet

Ogive – this is the curve of the bullet beginning at the Shoulder and going forward to the tip. Small variances in this, particularly in how those differences affect the seating depth of the bullet in the casing, can have a real effect on the flight path of your bullet – even for distances as short of 100y. Again, for defensive accuracy – the variance is acceptable, but for the precision shooter it can cause unexpected “flyers” that can be difficult to explain.

http://www.larrywillis.com/bullet-shape.html

Meplat Diameter – in the event the bullet tip is simply flat, it is the diameter of the flat surface. Should a tip be applied to the bullet, it is the diameter of the base of that tip.

Nose, Tip, Point – is the area at the end of the bullet between the Meplat Diameter and the very end of the bullet. It can be made of a broad range of materials depending on the purpose of the bullet.

Parts of a Casing

Mouth – is the end of the casing that receives the bullet. This region physically changes shape each time the cartridge if fired. To maintain precision this area may have to be trimmed to proper length as well and being milled to remain its concentricity thus insuring the bullet is properly positioned to go down the center of the barrel.

Neck – is that portion of the casing the actually receives the bullet. This area may also require some machining between the firing of the cartridge and then reloading it to insure the cartridge is as centered in the barrel as possible and properly fits the chamber.

Shoulder – is the transition area between the Body and the Neck. Care in keeping the length of the casing at its proper length helps insure the cartridge fits properly in the chamber at the rear of the barrel.

Body – is the primary container for the powder as well as the combustion chamber when the primer is struck igniting the powder.

Extractor Groove – provides a place on the rear of the cartridge where the spent casing can be grabbed and extracted from the chamber of the barrel.

Rim – is the edge of the cartridge and provides the lip of the Extractor Grove. Along its surface at the rear of the cartridge it also provides a space for the caliber of the cartridge to be stamped and a hole designed to securely hold a primer as well as a fire hole that the flame from a struck primer can use to enter of body of the cartridge to ignite the powder.

Head – is the base region of the casing consisting of the Rim and the Extractor Groove.

OK, Ok . . . so why is it important to know all the names for the various components/regions/areas of a cartridge? I just want to be an accurate shooter . . . what gives?

It’s simple really, accuracy depends on consistence. Precision. That each and every cartridge is exactly, precisely the same as the last one you shot. That is what gains you a higher level of precision and accuracy in your shooting . . . at least from the cartridge’s point of view. If all cartridges are identical, all shots will be identical. It’s a beginning, a component of accurate shooting.

There are three general categories of cartridges that play into accuracy. There is “store bought” for lack of a better descriptor. You go to the sporting goods store, pick up a 500 round box of .308 and you have a reasonable expectation that every round will fire when struck, that their performance is fairly consistent from cartridge to cartridge and that once zeroed for that particular batch of cartridges, the zero will hold reasonably well for the cartridge’s stand point. Ammunition in this category is typically what I would use for defensive use.

Next is “Match Grade” cartridges. With this type of ammunition you can make the valid assumption that within the batch number of the cartridge, bullet weights, cartridge form factors, primers, powder, cartridge length are much more precise and consistent from cartridge to cartridge than it is with “store bought”. For those shooters that are moving towards precision shooting, this is a great way to begin taking out variations in ammunition when it comes to the accuracy of their shooting. More expensive? Yep, but the tradeoff is that you have extremely consistent cartridges that perform much more consistently than “store bought”.

Finally, to take that very last step – you have hand loaded ammunition. At this point the shooter is in complete control of the performance of the cartridge. The casing can be measured, milled, cleaned, polished to make sure it exactly meets the parameters of the chamber of the specific gun it will be fired from. The fire hole in front of the Primer can be cleaned to insure the best possible transmission of fire from the primer. Primer lots can be used so each primer in each cartridge as the same performance (within tolerances anyway). The same can be said for the “load” of powder – the type of powder, the exact number of grains that are loaded – all of which can be tailored to the specific bullet to be fired. The bullets can be measured, weighed and grouped together by weight, diameter, length to make sure each and every bullet loaded in a specific lot are as close exact as is possible.

Finally, a lot of cartridges loaded with the same primer, number of grains of powder with the same bullets can be shot through a chronograph to see If the load meets the specifications from the loading charts.

All of these little bits and pieces are needed to work together to provide you a cartridge that is “accurate”. As I said, for defensive use – “store bought” is more than accurate for defensive distances. One can easily up the level of accuracy by going to “match grade”. And, finally, a shooter can take that last step, gain total control of the manufacturing of their ammunition and hand load each and every round.

Regardless of which you choose, this is the beginning of accurate/precision shooting – with ammunition that performs as close to “exactly the same” as you can get from cartridge to cartridge to cartridge.

This is “Part 2” of the series. I defined what I meant by the word “accurate” in Part 1. Here we’ve examined that cartridge. In additional parts we will consider the rifle, the weather and finally the shooter.

Tuesday, November 4, 2014

Review - Defensive Handgun Training - get out of your box


We’ve chatted in the past about taking training that pushed your personal limits . . . that demanded more of you that you typically expect of yourself. It’s the fastest way to grow . . . getting “out of your box”. I make it a point to take at least one training a year that really pushes me, makes me “step up” and teaches me things that I can integrate into my skillset. It keeps me “fresh”.

It doesn’t end there . . . there is the instructor side of my life as well that needs to be stretched, pushed, stressed as well. This past weekend was one such opportunity. A fellow trainer and I have been refining some course work that we believed would work well together. Mine was an introduction to the defensive use of handgun that I’ve been teaching, refining and using for nearly two years. Recently it’s been updated and it was time to wring out the updates.

My friend has been teaching his Dynamic Defensive Pistol course for about the same amount of time and had also recently updated his coursework as well. In conversations together, it seemed like a good idea to run these courses back to back in a brand new environment.

Enter a mutual instructor to our “east” . . . about 12 hours. (Yes, names are being withheld to “protect the innocent” J ). When I asked if he would be interested in our heading his way he was enthusiastic! So, this past weekend was our time. When asked about the weather his forecast was “rain, snow, sleet, heavy winds and low 30s! The weather will be great!! And, I have MREs!” he said . . . how could we refuse.

So, Friday morning – with my southern friend leaving at 3:30AM to meet me about 2 hours to my east, we met, combined in my Jeep and headed east for another 10 hours – arriving late evening. My friend and I had never been afforded the opportunity to spend 10 hours together to talk . . . I think we could become dangerous! We reviewed course material, ran the range drills through in our head, tweaked, suggested together, developed a new combined set of coursework . . . to say it was a productive 10 hours would be an understatement.

Our “student base” was going to be a mix of experienced instructors from throughout the Midwest as well as some very new instructors. We felt these folks would be our best shot at truly wringing out our updated coursework. Of course, it’s a bit like droppin’ your drawers in public . . . we had some pretty heavy hitters about to be given free rein to review our courses as they were taking them. More than a little intimidating! That said, if you’re unwilling to put yourself “out there”, it’s pretty difficult to grow . . . as either a student or an instructor.

Morning started early – 7AM - with a course “pre-brief” with our friend’s “core” instructor group. He offers a broad range of defensive training – from mixed martial arts to the NRA’s “Refuse to be a Victim” to firearms training. It was our hope we could fill a niche with our defensive handgun coursework and with an experienced cadre of instructors . . . what better place to wring things out.

We outlined what we were doing, how the coursework fit together and what we were expecting from them. I gotta, say a nice bunch of trainers – focused, experienced, opinionated, demanding . . . it was everything we could have hoped for! Once past the 1 hour pre-course review it was time for the remaining folks to arrive. With a full classroom in their seats (15ish I believe) we were ready to roll by 8AM.

I started the day with my defensive handgun course – a basic course but with an approach that begins with the idea that you are learning handgun skills with the intent to be able to defend myself. 78 slides, numerous demos, nearly 5 hours of lecture and give and take, along with a working lunch . . . I wrapped up the lecture portion of the course. Next would normally be the range portion. However, it wasn’t the rain/snow/sleet that really kept us off the range . . . it was the wind that would not have allowed a single target stand to remain standing that “persuaded” us to move into my friends Dynamic Defensive Pistol course’s classroom portion.

Another 2 hours of lecture of how the body responds when attacked unexpectedly . . . and we were done for the day. Then followed an hour of debrief with everyone, another 2 hours with the core staff and follow-up over a late supper at a local Bob Evans restaurant. Finally, about 9:30PM or so, we made it back to the motel – day one “in the can”.

Day two began with a repeat of meeting at the office early with our friend’s core group for new another review of the previous day . . . after everyone “chewed” on it for the night. The result was another hour of intense, focused and well thought out comments and ideas of the previous day’s work. To say this type of feed- back from training professionals is valuable would be a profound understatement! Then we packed up and headed to the range. The day was much better . . . 38*, becoming sunny and little wind, a nice improvement.

Range work for both of our courses is “busy”. I take a new shooter from firing their first shot to a “use of cover” drill in about 2 hours. It’s focused, mildly intense and busy. Everyone kept their head in the game, worked hard and before we knew it, my portion was done and lunch was on the way. After a very quick lunch we were back at it.

My friend’s range portion of his Dynamic Defensive Pistol is VERY intense – focused, incremental – with one drill building on the previous drill. Beginning to end, it’s a 6-7 hour range day. We had 2 hours . . . so we completed what we could. A quick review and then he moved them “forward” to new info. We made it through about 14 drills out of nearly 40 before the range closed for the day. The last drill was a draw from an open carry holster – with a startle response and movement – and a multi-round engagement center mass. There were tons of “wins” throughout the course but one woman in particular went from someone concerned whether she was up to the task to a woman who absolutely nailed her last engagement . . . complete with a big smile after she holstered her handgun for the last time!

This is what it looks like folks, very well done, from beginning to end!

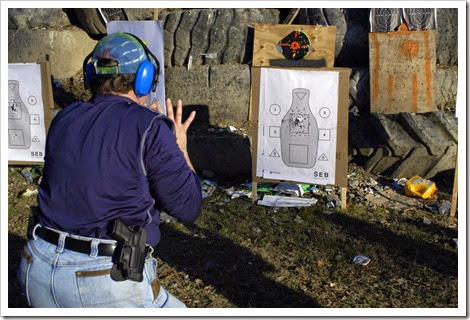
RECOGNIZE!

DSC_0263 (Medium) 

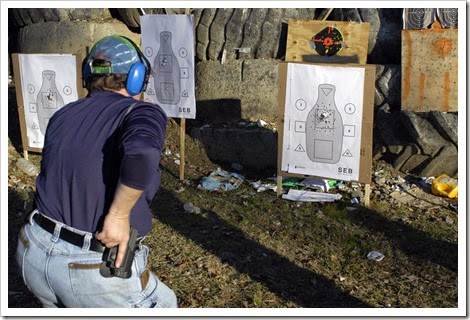
GRIP!

DSC_0264 (Medium)

STRAIGHT UP!

DSC_0265 (Medium) 

ORIENT!

DSC_0266 (Medium)

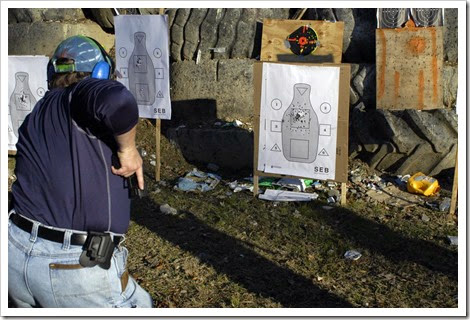
DRIVE – TOUCH – PRESS!

DSC_0267 (Medium)

We wrapped up the range and headed for a nearby restaurant for a great meal of ribs! A nice way to end our trip.

Unfortunately, we just ran out of time for a follow-up after the range portion . . . so I am anxiously awaiting their AARs. I asked that they be “comprehensive”! I suspect I won’t be disappointed. I also began a feedback post in their core trainer FB group. My friend and I were humbled by one very kind post . . .

“In my opinion, these drills are more systematic, therefore easier to present instructively. I believe the drills all build on the previous one, hence the dynamic progress of the lesson. I would like to study the lesson plans and slides (when the time comes) so as to have a lineal picture in my head as I would teach it. Frankly, some of the best training I've ever done.”

To say the trip was worthwhile would be an understatement. It’s very unusual to have the opportunity to present material to experience instructors, run them through the coursework and then avail yourself of their feedback. Did they “catch” things?? Yep, some actually quite glaring omissions in my coursework. Without their willingness to “play” I couldn’t make the improvements!

Bottom line – a fine time was had by all with lots of “good work” being done across the board – classroom, range and in the final review. Folks, I cannot thank you enough! Here are a few of the photos of the weekend! It was one of the best training trips I’ve ever taken part in!